
Framed agate slices are beautiful and eye catching, and I had been looking at purchasing them online when I quickly discovered the prices can be quite high for even just a single framed piece. I knew I wanted to create a uniform gallery wall of them for a wall in my home, and that I didn’t want to spend hundreds to do so.
After spending a little time looking for materials on Amazon, I realized I could recreate my own version of this look for a much more budget friendly option (around $50). That is quite the savings, so I decided to purchase the materials and give it a go.
I started by picking out frames. I knew I wanted a brass or gold look, and that I wanted a set of 6. When I came across this set of 6 for just under $30, I thought I’d give these a try!
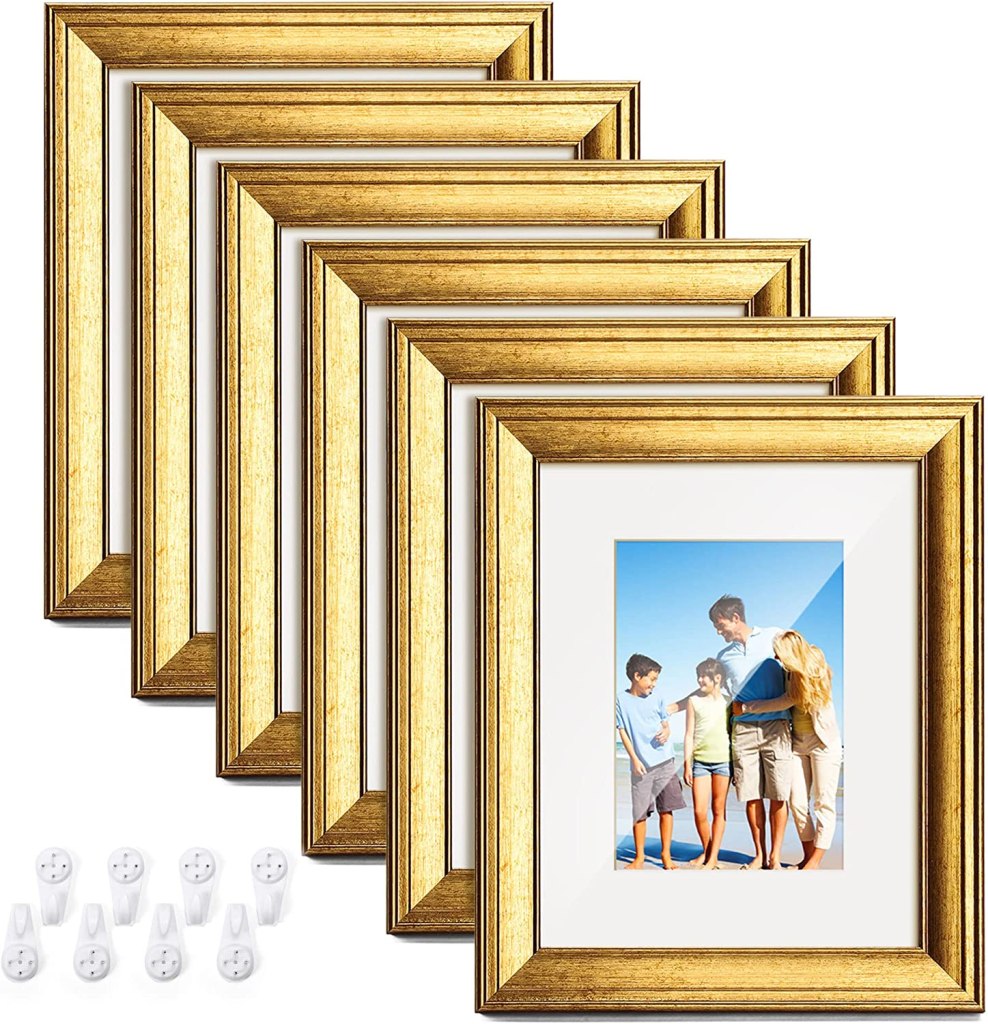
It’s important to note that the cost of these frames is equal to the quality. I achieved the look I was hoping for by using them, but they are very lightweight (they are not metal), and very delicate (you will need to handle them carefully as to not break them). If you are looking for something sturdy, these frames would likely not be the option for you. However, they worked perfectly for the low traffic area that I installed them in, and the plastic instead of glass was able to flex a bit around the agate slices. I actually preferred this to actual glass!
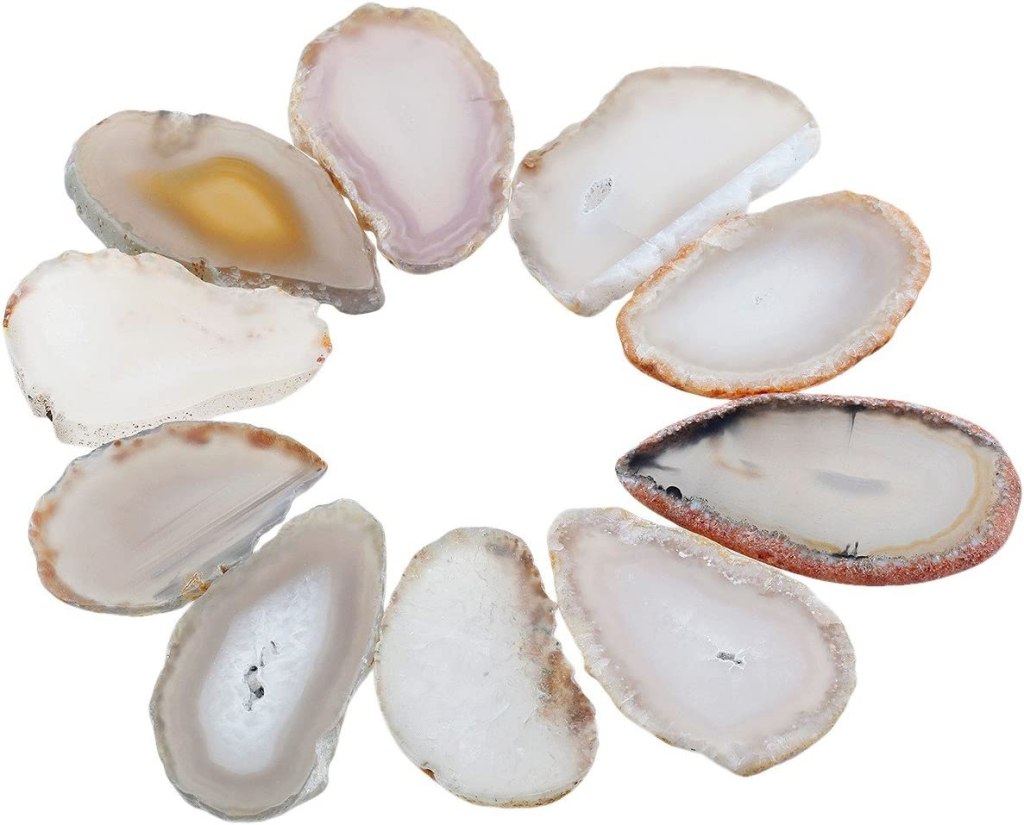
Next, I was on the search for agate slices. I found so many color options online, but I specifically wanted something neutral and natural looking. I found this set of 10 for $20 (there is also currently a 10% off coupon), and knew they were just the right fit.
The last thing I needed was cardstock paper for the backing, and just a little epoxy to adhere the agate to the cardstock. You can get creative in selecting your cardstock! I wanted a nice clean look, so I went with plain white. If you’d like to add some color or texture, you can choose any type of backing you’d like to use inside your frame.
I put a dab of epoxy in the center of each piece of cardstock and attached the agate slice to that. I let the agate dry overnight before putting them inside the frames. I also waited until the following evening to hang them, giving everything time to set.
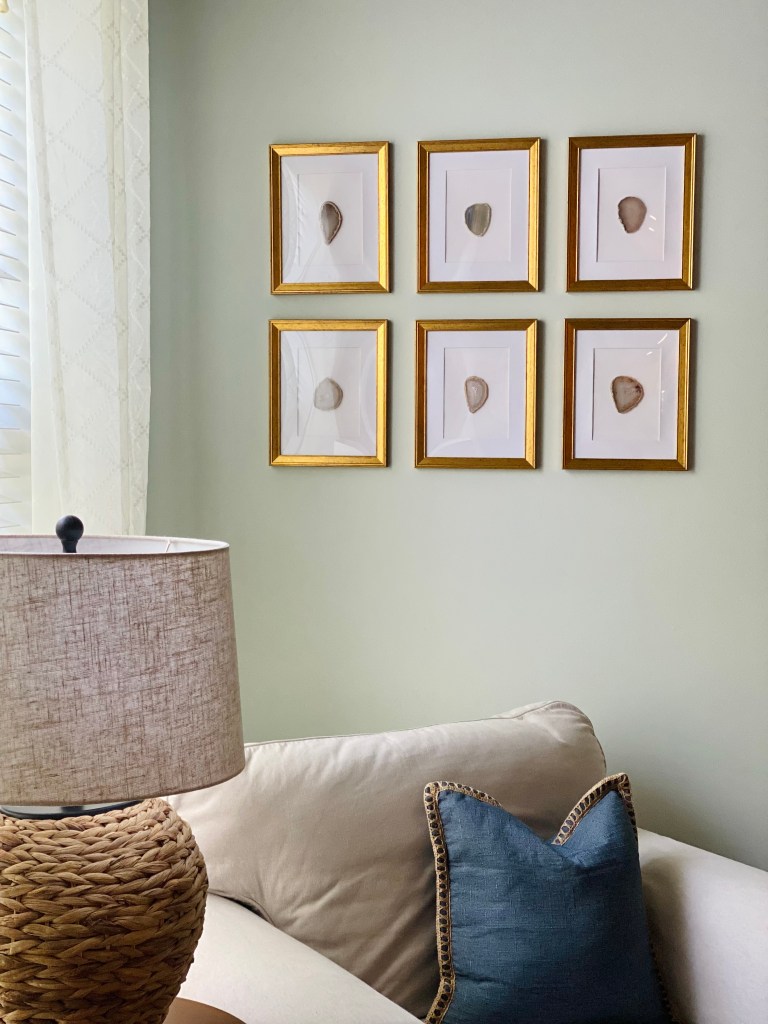

I am very pleased with the end result! There are so many ways you can recreate this look in your own home to fit your own style. Different frames, cardstock, agate slices, so many possibilities. If you’re looking for an easy DIY that makes a big impact, this is a great project to try.
Let me know in the comments what you think of this simple DIY!
